| 일 | 월 | 화 | 수 | 목 | 금 | 토 |
|---|---|---|---|---|---|---|
| 1 | 2 | 3 | ||||
| 4 | 5 | 6 | 7 | 8 | 9 | 10 |
| 11 | 12 | 13 | 14 | 15 | 16 | 17 |
| 18 | 19 | 20 | 21 | 22 | 23 | 24 |
| 25 | 26 | 27 | 28 | 29 | 30 | 31 |
- String Method
- openCV
- programmers
- Algorithm
- Matplotlib
- Stack
- 알고리즘 스터디
- 선그래프
- 프로그래머스
- 코딩테스트
- MySQL
- 노마드코딩
- Selenium
- 자료구조
- type hint
- 파이썬
- 백준
- aws jupyter notebook
- python
- pandas
- 알고리즘스터디
- Join
- 데이터시각화
- 정보처리기사 c언어
- queue
- 알고리즘
- dataframe
- NumPy
- 가상환경
- javascript
- Today
- Total
조금씩 꾸준히 완성을 향해
[AWS] Window에서 EC2 서버 구축하기 (P3 인스턴스- for deep learning) 본문
아래의 순서대로 들어가서 instance 생성을 클릭한다.
aws 접속 - EC2 - instances - Launch an instance
(참고로 지역을 서울로 설정하면 상대적으로 비용이 많이 청구되니 연구 목적이라면 남미를 추천)

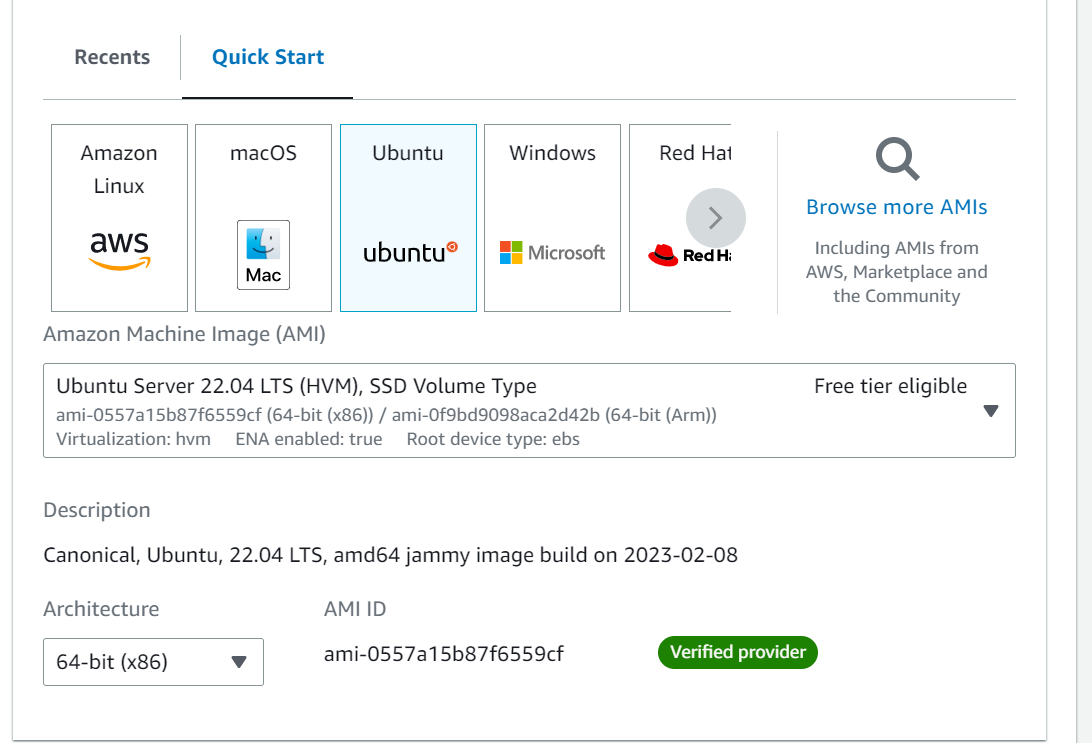
AMI 설정
- Ubuntu 선택
(처음에 lunux로 했다가 고생을 많이 했다.. 에러에 허덕이지 않기 위해서는 이왕이면 ubuntu로 시작하길 추천)

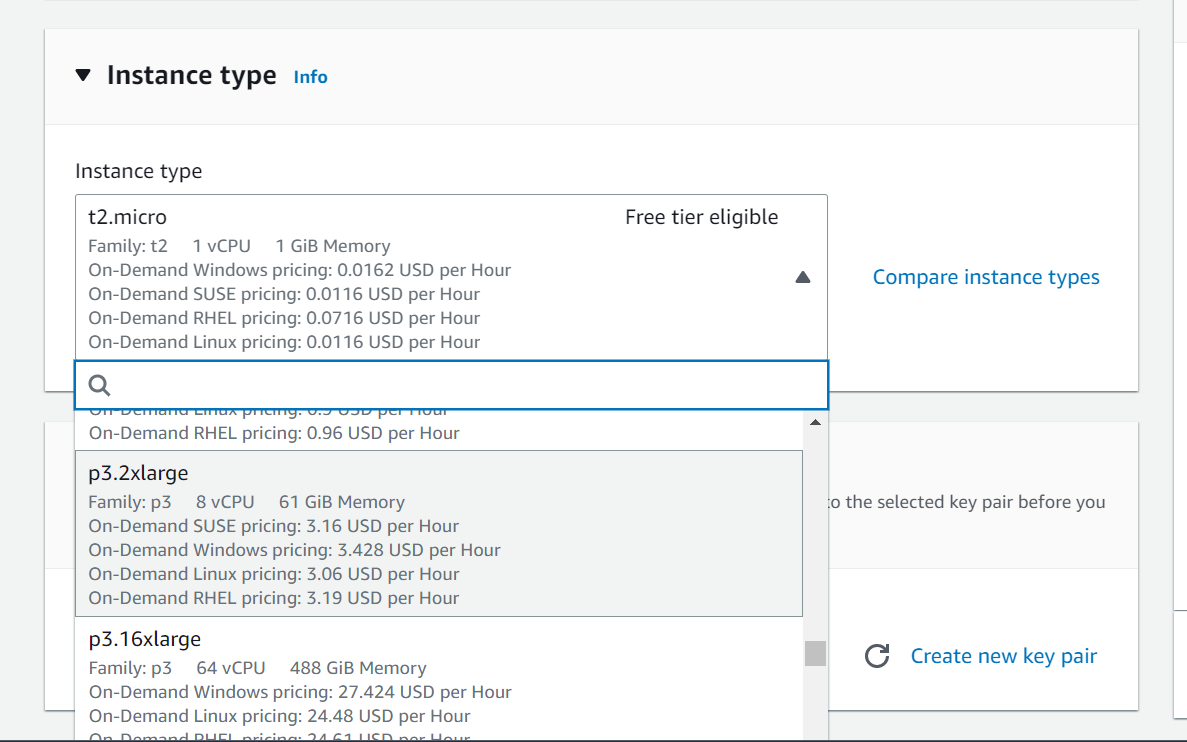
instance type 선택
목적과 예산에 맞게 비교해 보고 선택하면 된다.

deep learning - GPU에 특화된 instance 추천 페이지를 참고 바람.
https://docs.aws.amazon.com/dlami/latest/devguide/gpu.html
Recommended GPU Instances - Deep Learning AMI
The size of your model should be a factor in selecting an instance. If your model exceeds an instance's available RAM, select a different instance type with enough memory for your application.
docs.aws.amazon.com

나는 P3.2xlarge를 선택했다.
(학원에서 aws 비용을 꽤 많이 지원해 줘서 감사하게도 이렇게 비싼 서버도 써본다...ㅎㅎ)
key pair 선택
기존에 만들어 놓은 key pair가 있어서 선택해 주었다.
key pair가 없다면 Create new key pair 를 눌러 만들어 주면 된다.
나는 window10 환경이고, Putty 대신 OpenSSH를 설치해서 진행했다.
.pem 확장자로 key pair를 다운받았다.

network 설정
지금은 일단 SSH traffic만 추가해 놓고, 후에 jupyter notebook을 설치 한 후 추가로 포트를 할당해 줄 것이다.

storage 설정

Launce instance
이제 Launce instance 버튼을 눌러 준다.

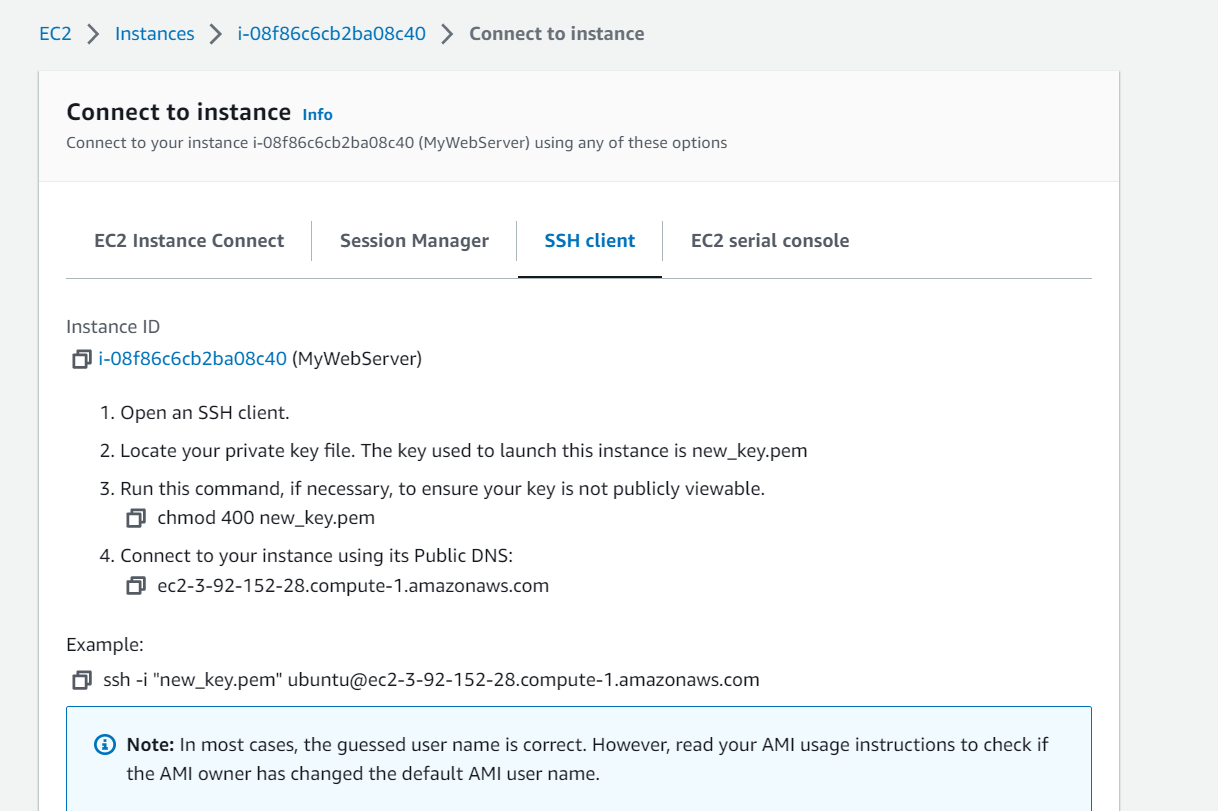
그리고 나면 이렇게 connect to instance 설정이 뜬다.
connect to instance
먼저 다운받아 놓은 key pair를 ssh가 저장된 폴더로 옮긴다
여기서 중요한 게 해당 폴더의 권한 설정을 변경하는 작업이다.
다음 과정을 거쳐 보안 주체를 관리자로만 설정해 준다.
우클릭 - 속성 - 보안 - 고급 - 상속 사용 안함 - "상속된 사용권한을 이 개체에 대한 명시적 사용권한으로 변환합니다" 선택
- 관리자가 아닌 모든 주체 제거

이렇게 설정해 주어야 instance 연결이 가능해 진다.
여기가지 완료 되었다면 windows powershell 을 관리자 권한으로 실행하고 ssh 폴더로 이동해 준다.
cd 폴더경로
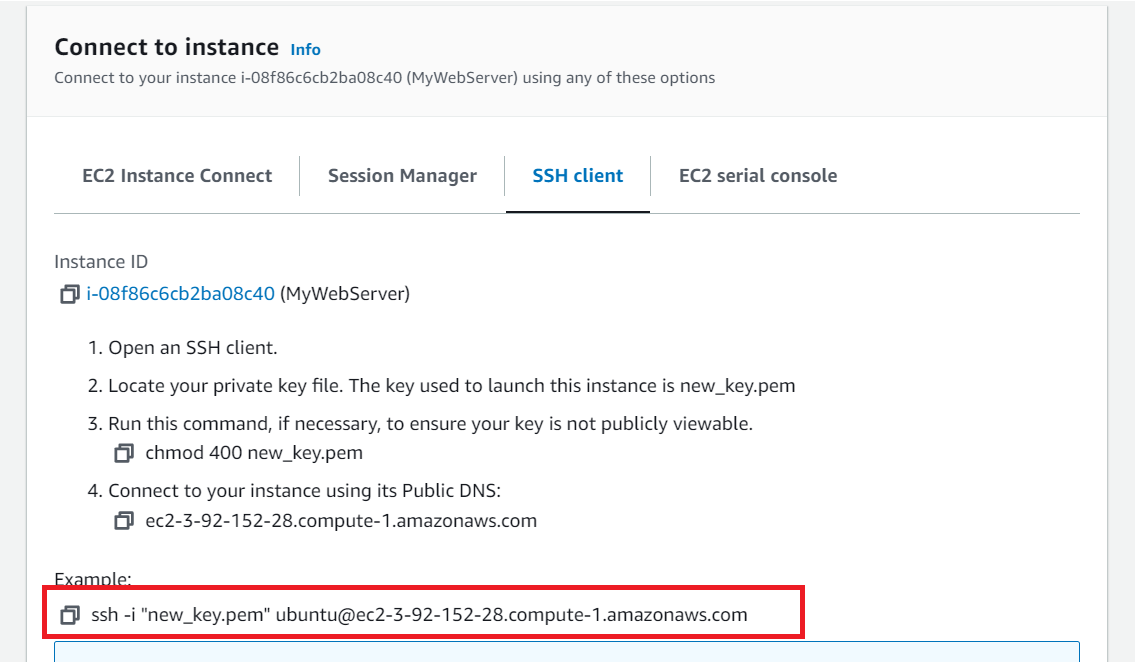
그리고 좀 전 화면에서 맨 아래에 있는 명령어를 복사한다.

저 빨간 부분의 명령어를 복사해 와서 power shell에다가 붙여넣는다.

yes를 입력해 주면 instance에 연결이 된다.

'AWS & Linux' 카테고리의 다른 글
| [AWS] Jupyter Notebook 백그라운드 실행 (1) | 2023.02.23 |
|---|---|
| [AWS] Jupyter Notebook 할당 메모리 늘리기 (kernel die error 방지) (0) | 2023.02.23 |
| [AWS] Ubuntu Jupyter Notebook 기본 설치 명령어 정리 (0) | 2023.02.23 |
| [AWS] EC2 서버 Jupyter Notebook 설치 및 실행 (0) | 2023.02.22 |
| [AWS] 특정 port에서 실행중인 서버 종료(The port 8888 is already in use, trying another port) (0) | 2023.02.21 |


